close
Choose Your Site
Global
Social Media
Views: 0 Author: Site Editor Publish Time: 2026-10-28 Origin: Site
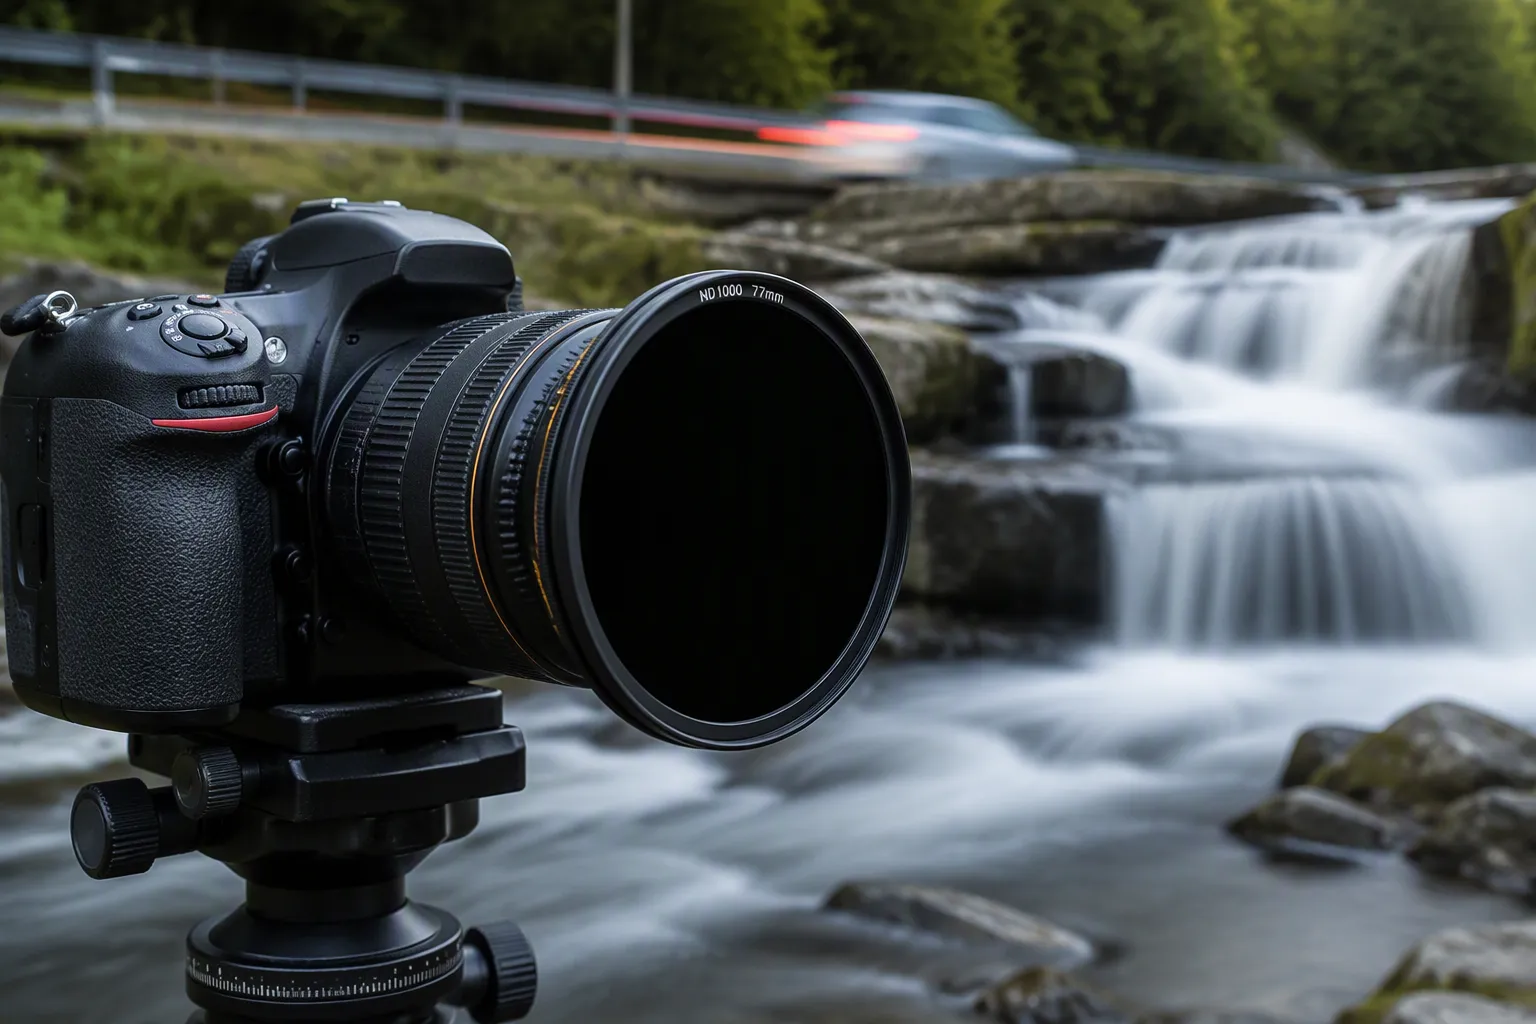
An ND filter works like sunglasses for your lens. It blocks light, so you can use a slow shutter speed even in bright conditions. That slow shutter is exactly what creates motion blur.
Picture a waterfall turned into silk, or car lights streaking across a road at dusk. Sounds tricky, right? It really isn't. You just need the right filter and a steady hand.
You'll walk away knowing how an ND filter unlocks motion blur, which strength suits your scene, and the simple habits that make long exposures succeed. Grab your camera and let's make some streaks.
An ND filter blocks light like sunglasses for your lens. This lets you use a slow shutter speed in bright light to make motion blur.
Pick the right filter strength for your scene. Stronger filters block more light and let you use longer exposures for dramatic effects.
Put your camera on a tripod, and use a remote or timer so it stays still. Focus before you put on the filter, because the viewfinder gets dark.
Figure out your new shutter speed by multiplying the original speed by the filter's number. Check your histogram to make sure the exposure is correct.
Begin with one scene and one filter strength. Practice and try new things to get good at motion blur.
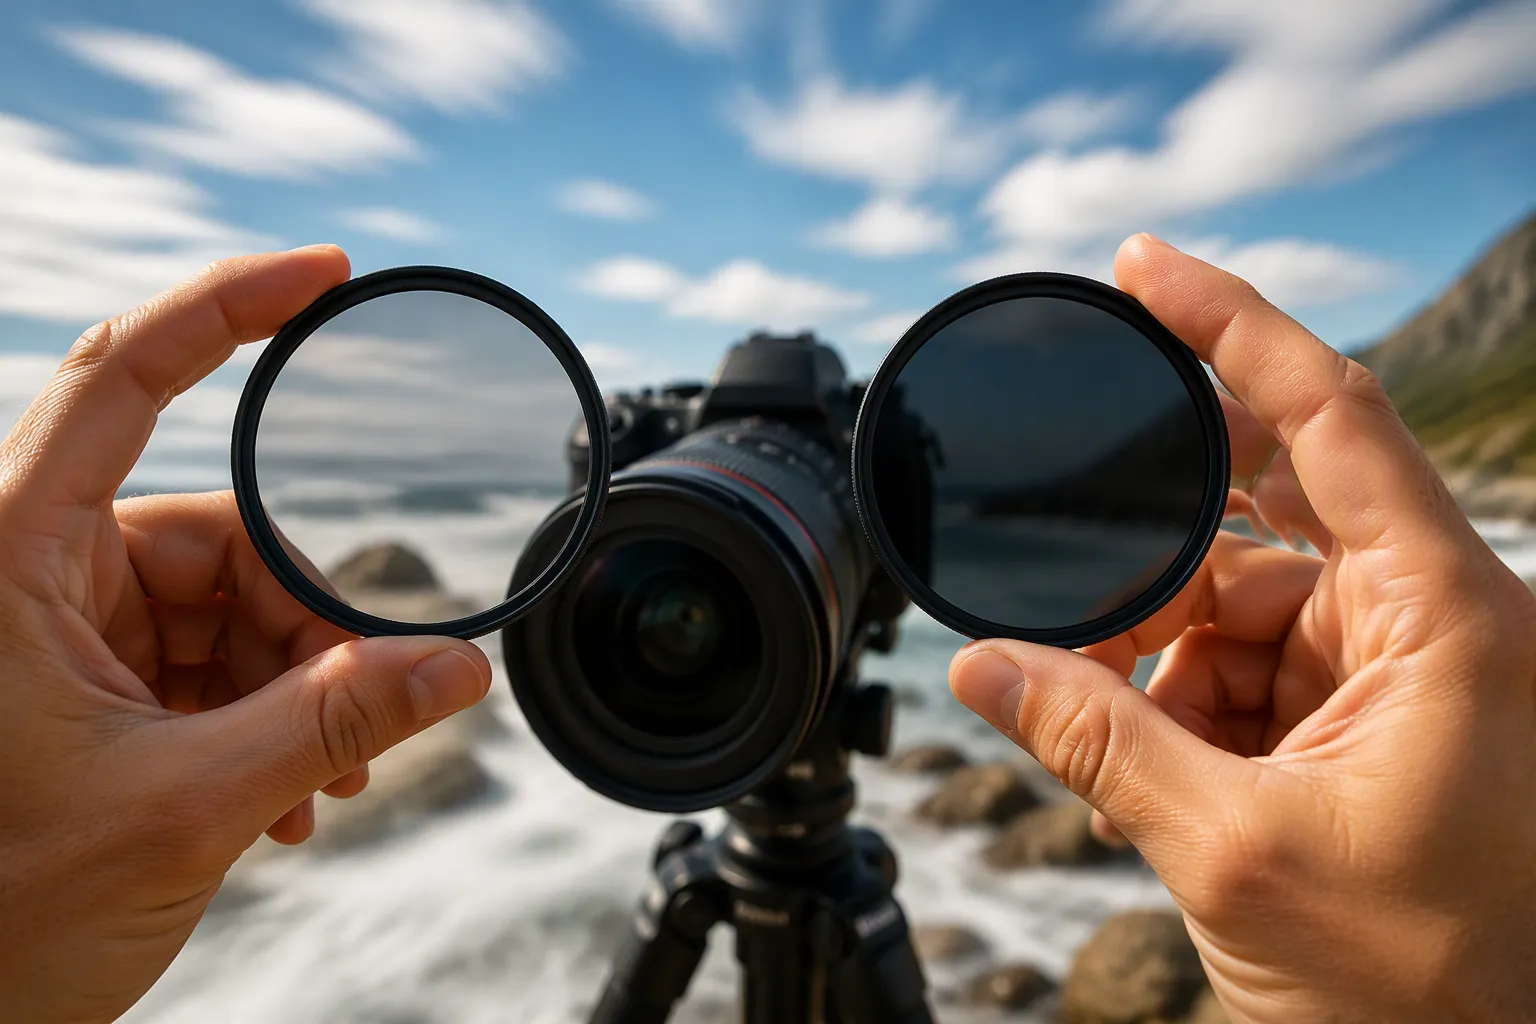
An ND filter sits in front of your lens and dims everything it sees. It cuts light intensity evenly across the whole spectrum. Red stays red, blue stays blue — just darker. That neutrality is the whole point. Neutral density filters lower the brightness of every wavelength by the same proportion, so your camera records the same colors, only with less light to work with. The filter's optical density sets how much attenuation you get, and that value holds steady across the specified wavelength range.
Think of it as sunglasses for your lens. You put them on, the world gets darker, but a red apple still looks red. The filter does the same job. It reduces the total light entering the camera without touching the color balance. A well-made filter keeps that balance clean, and the principle itself is color-neutral by design. Thin-film coatings help here. They hold performance steady across the spectrum, so no single color gets dimmed more than another. Absorption and reflection work together to lower intensity while keeping the result neutral.
This matters because your camera's meter only cares about brightness. Feed it less light, and it compensates somewhere — usually by lengthening the exposure time. That is the doorway to motion blur. The filter does not change what your sensor sees in terms of color. It only changes how much of it arrives. Your meter reads the dimmer scene and asks for more time.
Here is the problem. On a bright day, your camera wants a brief setting to avoid blowing out the frame. It might force a fast shutter speed. At that setting, moving water freezes into droplets and passing cars turn into parked objects. No streaks, no silk, no drama. You lose all the creative payoff of a long capture, and the scene looks flat.
You need a slower shutter speed to create motion blur. Bright light fights you every step of the way. An ND filter settles the argument. Less light comes in, so slower shutter speeds keep the image correctly bright. The chain is simple: less light in, longer capture possible, moving subjects streak, motion blur appears. That is how ND filters help create motion blur — not by adding anything, but by taking light away.
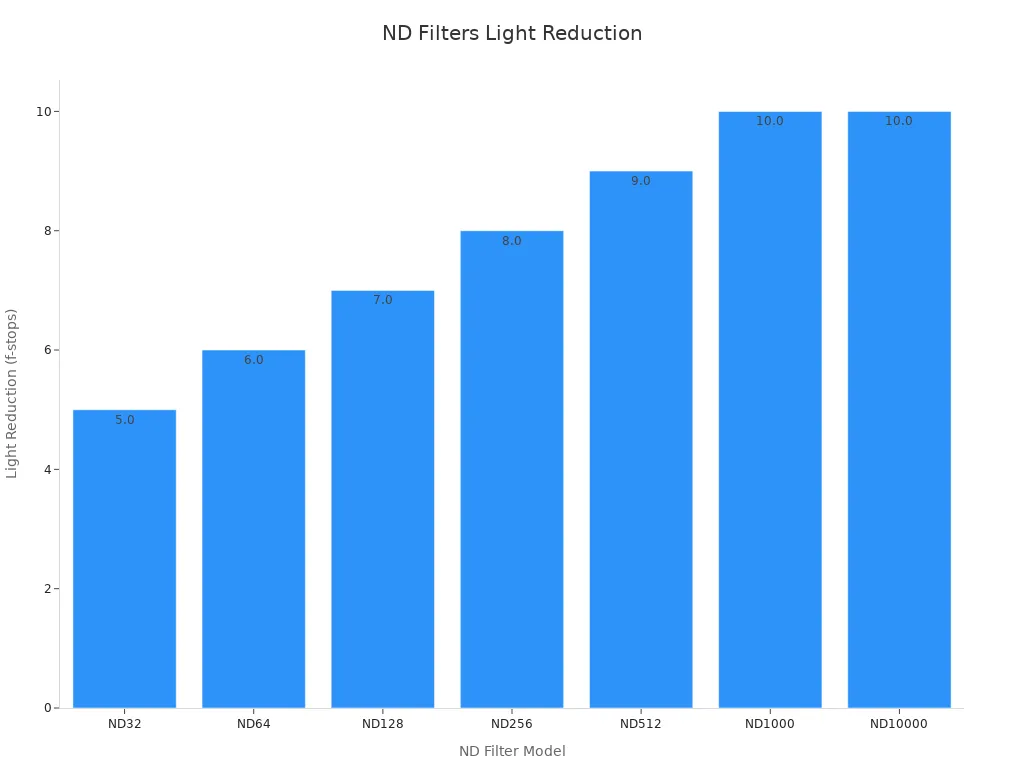
The strength you pick sets how far you can push it. A weak filter barely moves the needle. A strong one opens up whole seconds of capture time. Here is how the common grades stack up:
ND Filter | Light Reduction (f-stops) | Effect on Exposure | Motion Blur / Creative Use |
|---|---|---|---|
ND32 | 5 stops | Allows slower shutter speed / wider aperture in bright light | Softer, creative shots with motion blur |
ND64 | 6 stops | Enables slow shutter (e.g., 1/1000s at ISO 100, f/1.4) without overexposure | Motion blur and shallow depth-of-field in bright light |
ND128 | 7 stops | Blocks light to slow shutter speed | Motion blur in bright sunlight |
ND256 | 8 stops | Blocks up to ~99% of light | Long-exposure motion blur in harsh light |
ND512 | 9 stops | Blocks up to ~99.9% of light | Long-exposure motion blur in harsh light |
ND1000 | 10 stops | Reduces shutter speed to ~15 seconds | Dramatic long-exposure motion blur in harsh light |
ND10000 | ~10+ stops | Blocks up to 99.99% of light | Extreme long-exposure motion blur in bright/harsh sunlight |
The pattern is clear. Stronger filters block more light, and that buys you longer captures. Photographers use ND filters to reach capture times that daylight would otherwise forbid. An ND1000 drops your shutter speed to roughly 15 seconds in harsh sun. That is where clouds smear and water turns to glass. Using an ND filter well means matching that strength to the scene in front of you. Pick too little, and the sun still wins. Pick enough, and the capture time you want finally becomes reachable. The amount of motion blur you get scales with how long the frame stays open.
Water is the classic subject for making motion blur effects. A shutter speed of 0.5 to 2 seconds turns rushing water into a silky stream with visible texture and stream separation. You'll want a 3–6 stop nd filter in shade, or a 6–10 stop version in daylight. Push to 5 seconds or longer with a 10-stop filter, and the waterfall becomes full ethereal mist.
Subject | Desired Effect | Recommended Shutter Speed | ND Filter |
|---|---|---|---|
Waterfall | Silky flow (visible texture, stream separation) | 0.5 s to 2 s | 3–6 stop (shade); 6–10 stop (daylight) |
Waterfall | Full ethereal mist | 5 s or longer (up to 30 s) | 10 stop |
Coastline / Ocean | Smooth ocean blur (milky, fog-like surface) | 15 s to 2 min | 10 stop (standard); 15 stop (midday) |
Coastlines reward patience. Around 15 seconds, waves lose their individual shape but keep some texture. From 30 to 60 seconds, the surface becomes milky and fog-like. Exposures of 2 to 4 minutes in bright daylight with a 10-stop filter yield a completely glassy surface where only static elements like rocks, piers, and the horizon remain visible.
For traffic light trails, find an elevated nighttime position above a road. A 15–30 second exposure lets moving traffic draw the streaks. Red taillights and white headlights travel in opposite directions, producing natural separation in the frame.
An object renders as blurred if it changes position between shutter open and close. The amount of blur depends on (1) the object's speed relative to shutter duration and (2) the relative distance it moves during the exposure. A slow-moving car may need a 0.6-second shutter for noticeable blur, while a car crossing the frame during a 1-second exposure becomes nothing but a blur.
Crowds work differently. At 0.6 second, a woman standing still at a corner stays sharp while passersby blur, creating static/dynamic contrast. At 2 seconds in low evening light, bodies blur but individual footfalls remain visible because feet pause briefly with each step. For motion blur photography in busy spaces, try this: mount your camera on a tripod and frame the shot. Take a sharp plate shot at a fast shutter speed with subjects in position. Without moving the camera, slow the shutter to 1/10 sec or slower and shoot multiple frames as people move through. In post, composite the sharp plate over the long-exposure frame, masking subjects onto the blurred background. The result: sharp subjects against a ghosted crowd.
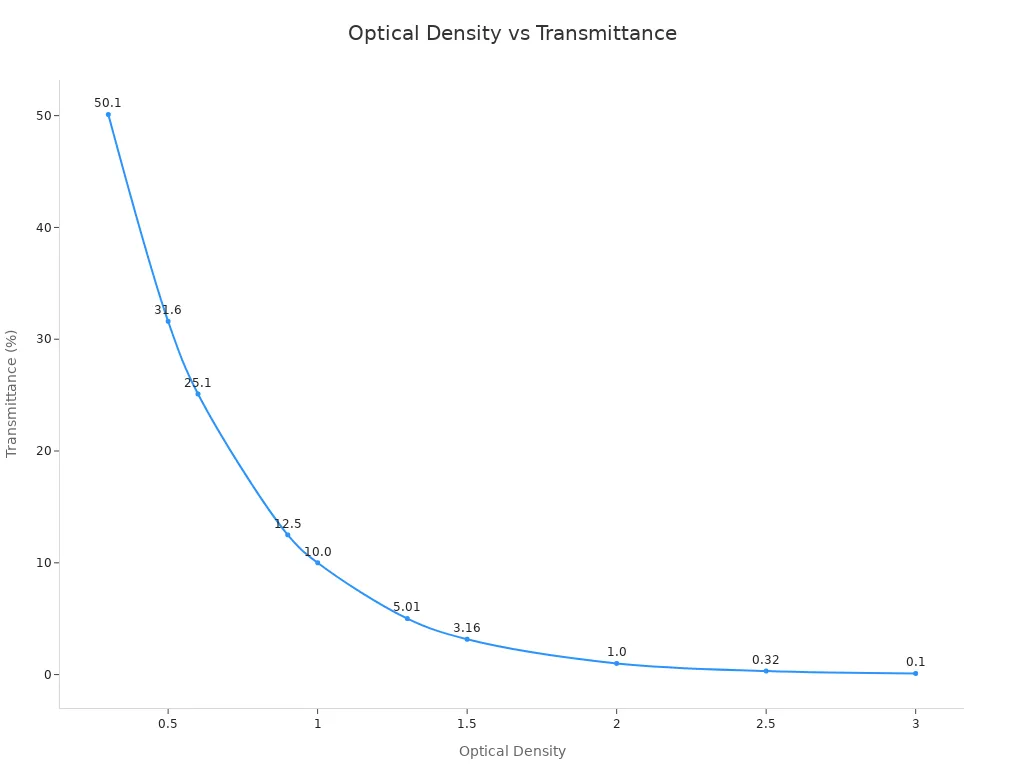
Choosing the right ND filter strength starts with understanding optical density. The relationship follows a simple rule: transmission equals 10 to the power of negative optical density, or T = 10^(-OD). A filter with OD 2 passes about 1% of light. OD 3 passes roughly 0.1%. OD 4 drops that to 0.01%. At the low end, OD 0.3 lets about 50% through — barely a filter at all.
Optical Density | Transmittance (%) |
|---|---|
0.3 | 50.1 |
0.5 | 31.6 |
0.9 | 12.5 |
1.0 | 10.0 |
1.5 | 3.16 |
2.0 | 1.00 |
3.0 | 0.10 |
Match density to your conditions. Overcast skies and shade call for lower OD values — you already have less light, so a gentle filter does the job. Bright sun or very long exposures demand higher OD. A variable neutral density filter lets you dial in continuous attenuation instead of swapping fixed filters.
Band Optics makes neutral density filters across both ranges. Their OD 0.04–2.0 line suits photography and general imaging, where you want moderate control without going pitch dark. The OD 0.04–4.0 range steps up for demanding laser and detector work. Both use UV fused silica substrates with Inconel or dielectric coatings. Uncoated versions cover 240–1200 nm, while AR-coated models run 350–1050 nm. Each range fits its own job — pick the one that matches your scene and your gear.
Once you pick a filter, you need to recalculate your shutter speed. Here is the workflow:
Mount every filter except the ND, take a test shot, and note the shutter speed (say 1/125 s).
Attach the ND filter. The number on it tells you the multiplier — ND1000 means multiply by 1000.
Convert the fraction to seconds: 1/125 s = 0.008 s.
Multiply: 0.008 s × 1000 = 8 seconds.
For ND64: 0.008 s × 64 = 0.512 s, about half a second.
Each stop doubles the time. Base 1/125 s becomes 1/60 s at one stop, 1/30 s at two stops, 1/15 s at three. For ND1000, multiply by 2 to the tenth power — roughly 1000 — and you land near 8 seconds. A smartphone app or conversion table saves you the math when you are standing in the field.
The key to how to use ND filters well is nailing correct exposure before you chase motion blur. Meter first, attach the filter, recalculate, shoot, then check your histogram. That habit keeps your long exposures clean and your streaks sharp.
A sharp long exposure starts with a rock-steady base. Mount your camera on a tripod, then trigger the shutter with a remote or the timer. Pressing the button by hand adds shake, and shake ruins the whole frame. Compose your shot and set focus before you attach the filter. Once that dark glass is on, the viewfinder gets dim and focusing becomes a guessing game.
Panning is another way to get motion blur effects with a crisp subject. Follow the moving subject smoothly at a slower shutter speed, around 1/30 s or slower depending on its speed. Keep the subject in the same spot in your viewfinder as it crosses the frame. This takes practice, and a tripod helps a lot. You can also anchor a still subject in focus while the crowd or traffic blurs around it.
For video, set your shutter to double the frame rate. That gives you a cinematic and natural look. Here is the starting point:
Frame rate | Shutter speed |
|---|---|
30 fps | 1/60 s |
60 fps | 1/120 s |
This is a starting point, not a hard rule. Heavy movement or electronic stabilization may call for a somewhat faster shutter. An nd filter for your video makes these settings possible on bright days. Without one, the sun forces fast shutters and kills the amount of motion blur you want.
Here is the exposure workflow for stills:
Meter the scene without the filter and note the shutter speed.
Attach the nd filter.
Recalculate the shutter speed using the filter's multiplier.
Shoot, then check your histogram.
Fine-tune exposure in small steps, since tiny shutter changes shift the artistic result. These nd filter tips keep your camera settings honest. For custom or precision options, Band Optics' Optical Filters portfolio covers a wide range of filter types. With using nd filters, you control frame rate, motion blur, and the cinematic look in one pass.
An ND filter hands you control over light and time. That control is what turns a plain scene into something with real motion blur. The technique rewards experimentation, so don't worry about getting it perfect on the first try.
Start with one scenario, like a waterfall, and one filter strength. Learn how that combo behaves. Then branch out to coastlines, traffic, or crowds. Each new subject teaches you a little more about timing and patience.
Long exposures open a door to images you can't see with your own eyes. Step through it, play a little, and enjoy what you create.
Start with a mid-range filter and learn how it behaves. Shade and overcast scenes need less density. Bright sun and very long exposures need more. A variable nd filter lets you twist one ring instead of swapping glass, which saves time in the field.
Meter the scene without the filter first. Then multiply that time by the filter's number. Each stop doubles the time, so a 10-stop filter multiplies by roughly 1000. Check your histogram after the shot and adjust in small steps.
Yes, and they shine there. Set your shutter to double your frame rate for a natural look. A filter lets you hold that setting in bright light. This one trick improves video quality more than most gear upgrades, and it keeps your speed consistent across clips.
It depends on your subject and how fast it moves. Water turns silky in about half a second to two seconds. Traffic needs longer. Test a few times, review the results, and adjust. Patience pays off here.
Camera shake is the usual culprit. Use a tripod and a remote or timer. Set focus before the filter goes on, since the viewfinder dims. A steady base keeps your subject sharp while everything else streaks.