close
Choose Your Site
Global
Social Media
Views: 0 Author: Site Editor Publish Time: 2026-10-28 Origin: Site
An ND filter works like a pair of sunglasses for your iPhone lens. It cuts the light entering the camera without changing colors. So you can use longer exposures and wider apertures even in bright sun. Bright light usually forces the camera to raise shutter speed. That control pays off in silky waterfalls, blurred crowds, creamy background blur, and smoother video — all from the phone in your pocket. ND filters earn their place in mobile photography for exactly these moments. This guide explains why they help and how to choose, mount, and shoot with one. You will finish with steps you can try today.
ND filters reduce light like sunglasses for your iPhone. They let you use slow shutter speeds in bright sun to create special effects.
Pick filter strength by scene: ND8 to ND64 for video, ND1000 for long exposures. A variable ND filter works in many conditions.
Attach the filter firmly and use a camera app you control by hand. Keep the ISO low and the shutter speed slow. Use a tripod and a timer to get sharp shots.
Stop overexposure by choosing a stronger filter. Prevent color casts by shooting in RAW and setting white balance. Keep the glass clean so your images stay sharp.
ND filters let you capture silky waterfalls, blurred crowds, and smooth video. Practice with one filter and one scene to build your confidence.
Bright sun leaves the iPhone with few good options. The camera senses all that light and pushes the shutter speed up, sometimes into the thousandths of a second. Fast shutter speeds freeze everything, so a crashing wave looks like glass shards and a walking crowd looks like statues. You lose control over motion. An ND filter changes that math. It cuts the light entering the lens evenly, without altering color, which matters most in bright daylight. Now the camera can slow down without overexposing the frame. A two-second exposure becomes possible at noon, and that is where the creative fun starts.
Video benefits just as much. Filmmakers follow the 180-degree shutter rule: shutter speed should be roughly twice the frame rate. Shoot at 30 frames per second, and the shutter should sit near 1/60 second. In daylight, the iPhone cannot hold that setting without help. Neutral density filters bring the light down to a level where the shutter can stay slow and the motion stays smooth. The result looks cinematic instead of choppy. Using an ND filter with an iPhone for video is a definite yes.
An ND filter is not a gimmick for video shooters. It is the tool that keeps daylight footage looking natural.
For stills, the payoff depends on the scene. Neutral density filters shine in three situations: long exposures, motion and blur effects, and wide apertures under harsh sun. A portrait photographer can open the lens wide for creamy background blur without blowing out the highlights. A street shooter can blur passing traffic into streaks. Point the phone at a static building, and the filter does little. Match the tool to the moment.
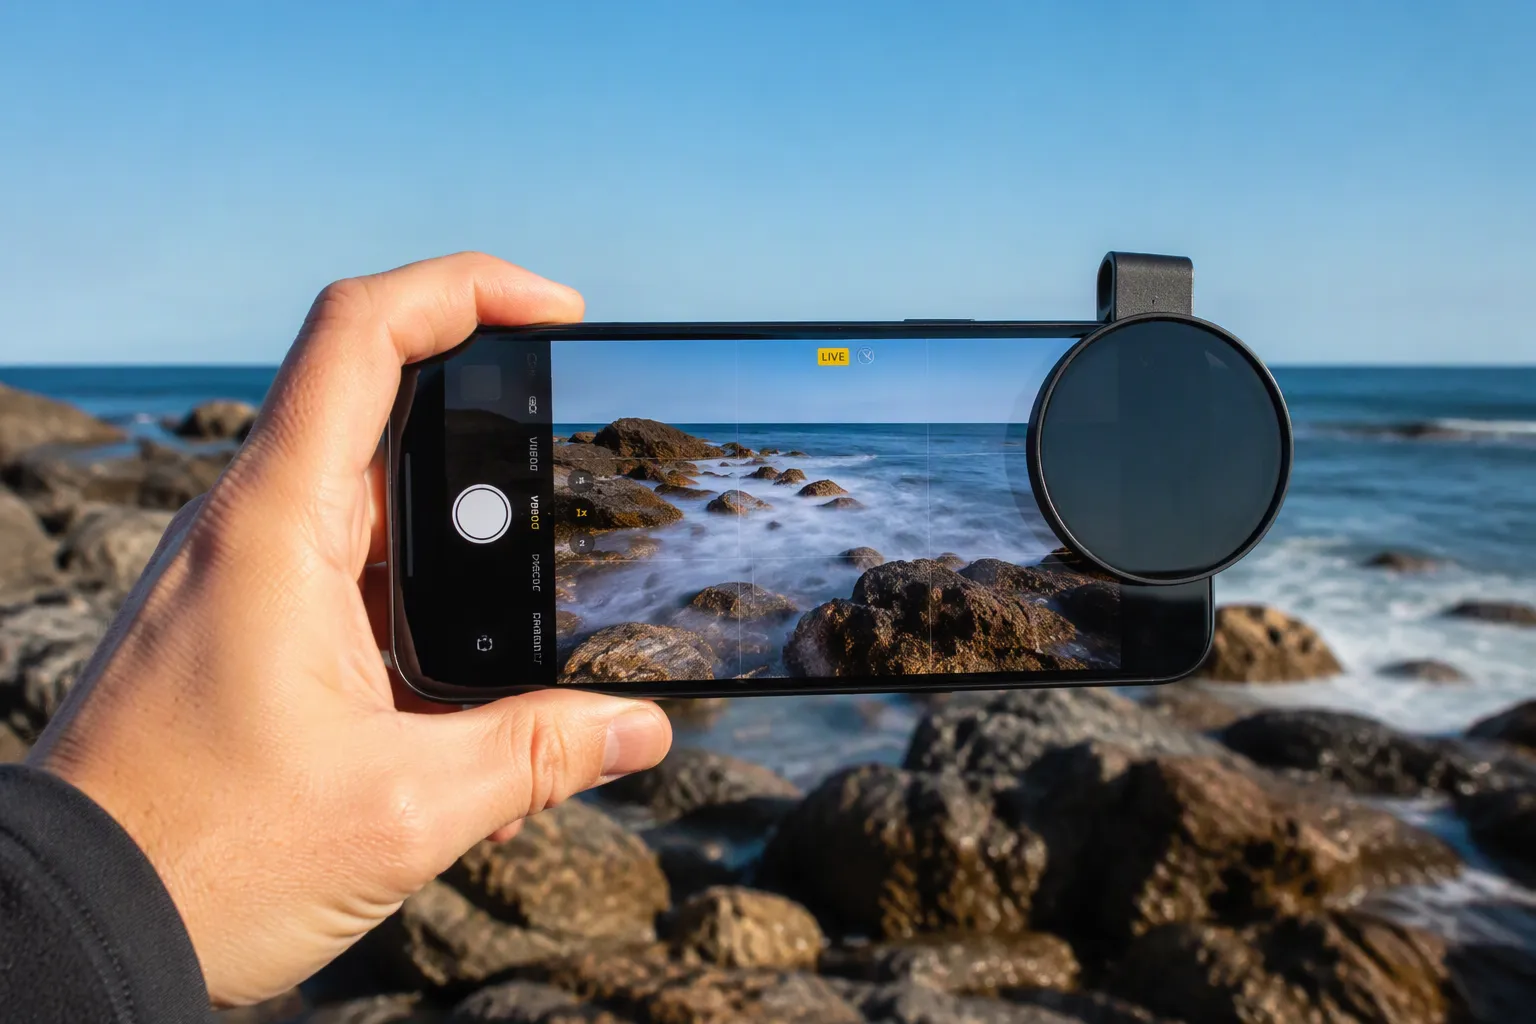
Long exposure seascapes show the long exposure effect at its best. Waves roll in and out during a multi-second frame. The camera records that movement as a soft, milky sheet instead of hard foam. Rocks stay sharp. Water turns to mist. The same trick works on busy streets, where people dissolve into ghostly trails while the architecture holds steady.
Slower shutter speeds demand stillness from the phone, so a tripod or a steady ledge is essential. Hand-holding a long exposure almost always produces a soft frame. The reward is worth the setup. A single filter strength, a stable surface, and a little patience turn an ordinary beach snapshot into something that looks shot on a dedicated camera.
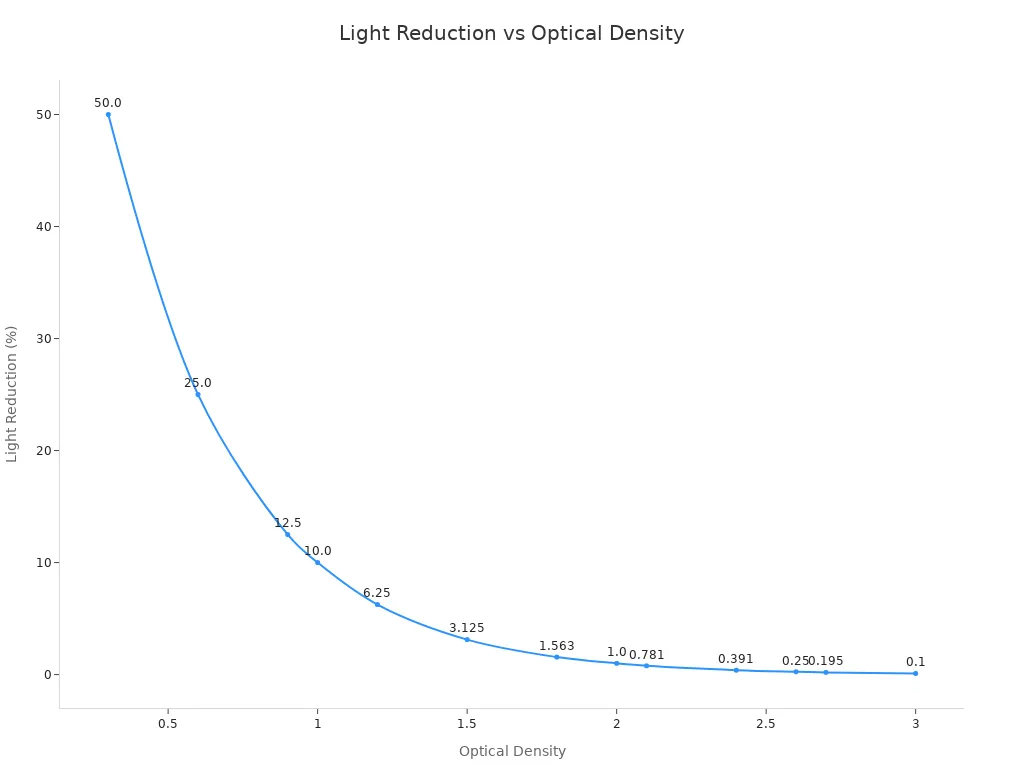
Strength is the first decision. ND numbers describe how much light the glass removes, and optical density (OD) expresses the same idea on a log scale. The table below shows the common range.
ND Filter | Optical Density | Light Reduction (Transmittance) |
|---|---|---|
ND2 | 0.3 | 50% |
ND4 | 0.6 | 25% |
ND8 | 0.9 | 12.5% |
ND16 | 1.2 | 6.25% |
ND32 | 1.5 | 3.125% |
ND64 | 1.8 | 1.563% |
ND100 | 2.0 | 1% |
ND1000 | 3.0 | 0.1% |
Match the strength to the scene. Video shooters often reach for ND8 to ND64, because those steps tame daylight without going dark. Long exposures want ND1000, which passes just 0.1% of the light. A set of neutral density filters covers more ground than one extreme density.
Band-optics makes neutral density filters worth a look here. The lineup includes fixed and variable models, and the variable version adjusts continuously through a 270-degree rotation. Imaging versions span OD 0.04 to 2.0. UV fused silica substrates keep color shift low, and the filters cover a broad spectral range.
Mounting shapes the shooting experience. Clip-on holders fit any phone and cost little, though thick cases get in the way. Magnetic mounts snap on in about 2–3 seconds and need an iPhone 12 or newer. Case-based mounts stay secure and align with a specific lens.
A circular polarizer solves a different problem. CPL filters cut glare from water and glass, deepen skies, and boost color. Neutral density filters cut light instead. Reach for a CPL filter when reflections ruin the frame. Grab the ND when motion blur is the goal. Combined CPL/ND filters handle bright days with shiny surfaces in one piece. Many shooters keep a CPL filter and a variable ND filter in the bag, then pick based on the scene.
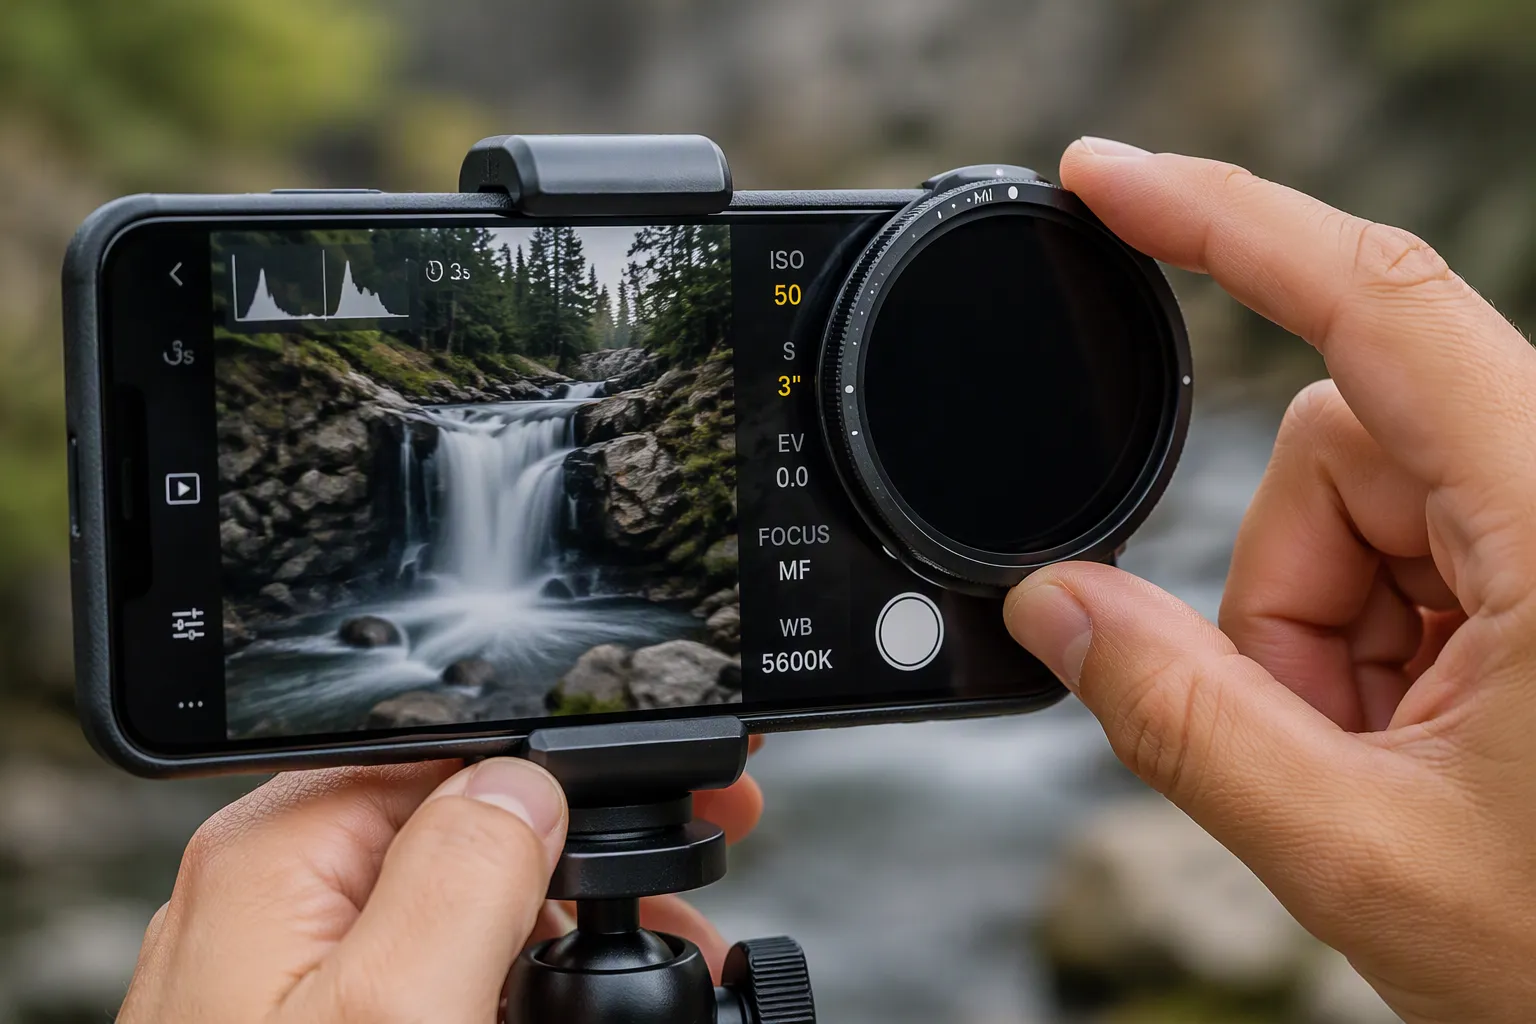
The native camera app gives you little control, so start with a manual app. Here is a workflow that works with a variable ND filter and a manual camera app like Moment Pro Camera.
Mount the filter on the iPhone and open the app in standard photo mode.
Switch the capture format to RAW, or ProRAW if the phone supports it. The default is HEIF or JPEG.
Frame the subject and lock the phone onto a tripod for a steady shot.
Set ISO to the lowest value available, typically ISO 34, and set the shutter speed to 1 second.
Remember that Apple caps shutter speeds at one second, so the interface may feel slow at the limit.
Rotate the filter to cut light until the frame looks right, and watch the histogram to judge exposure. Turn the histogram on under Settings > Exposure and Focus > Histogram.
Use the timer with a 3-second delay to avoid vibration when the shutter fires.
That last step matters for long exposures. Even a light tap can blur a one-second frame. A quality ND filter helps overcome mobile sensor limits, and band-optics builds its filters for low color shift and a flat spectral response. The variable version adjusts through a 270-degree rotation, and imaging models span OD 0.04 to 2.0, so one filter covers many lighting conditions.
Color casts creep in when the glass is not truly neutral. White-balance the shot before you commit, or shoot RAW and fix the tint later. A gray card or a white wall gives the app a reliable reference. This small habit protects skin tones and skies alike.
Vignetting usually comes from poor alignment. Center the filter over the lens and seat it flat against the mount. Off-center glass darkens the corners, and no amount of editing brings that detail back. Check the edges on the screen before every shot.
Clean glass means sharp glass. Wipe the lens and the filter with a microfiber cloth, because fingerprints scatter light and soften fine detail. Keep the phone still during the exposure using the shutter speed or ISO you set earlier, and refocus after you attach the filter. Autofocus can drift once the light drops.
Balance the exposure using the shutter speed or ISO, never both at once. Lock one value, then adjust the other. This approach keeps your camera settings predictable across a series of frames. A cpl filter pairs well here too. It tames reflections on wet sand or glass, while the ND filter handles the light. Together they give clean color and crisp detail in harsh sun.
Overexposure tops the list of complaints. A filter that is too weak lets too much light through, and the frame clips to white. The histogram piles up on the right edge, and highlight detail disappears. The fix is simple: step up to a stronger neutral density filter. If ND8 still leaves the scene too bright, move to ND64 or ND1000. Each step cuts the light further and brings the exposure back under control.
Color casts come from glass that is not truly neutral. Cheap filters often add a magenta or green tint, and the whole image looks off. Shoot RAW and correct the tint in editing, or white-balance against a gray card before the shot. A cpl filter helps here too, because it removes glare that confuses the meter. Pair a cpl filter with a clean neutral density filter, and the colors stay true.
Soft frames usually trace back to shaky hands. A long exposure amplifies every tiny movement, and the shutter speed drops low enough that even breathing blurs the shot. Use a tripod or rest the phone on a stable surface. A three-second timer removes the vibration from a finger tap.
Clean glass matters just as much. Smudges scatter light and soften fine detail, so wipe the lens and the nd filter with a microfiber cloth. Lock the focus after mounting the filter, since autofocus drifts in dim light. Set the shutter speed and ISO one at a time, and check the exposure before every frame. A cpl filter on a bright day also cuts reflections that hide sharpness. Small habits like these keep every shot crisp.
Light control, creative motion blur, and smoother video — those three wins make nd filters a smart buy for any mobile shooter. The filter is small and affordable, yet it unlocks pro-level results from the phone in a pocket.
Practice builds confidence fast. Pick one filter strength and one favorite scene, like a waterfall or a busy street. Shoot it a few times, adjust the exposure, and watch the frames improve. Then get out there and have fun with it.
A variable ND filter makes a smart first pick. One filter covers many lighting conditions, and the band-optics variable model adjusts continuously through a 270-degree rotation. Shooters who prefer fixed glass can start around ND8 for video and add ND1000 later for long exposures.
Good neutral density glass cuts light evenly across the spectrum, so colors stay true. Low-quality filters can add a magenta or green tint. Band-optics builds its filters on UV fused silica substrates for low color shift and a flat spectral response.
It depends on the mount. Clip-on holders struggle with thick cases, while magnetic mounts need an iPhone 12 or newer. Case-based mounts align with a specific lens and stay secure. Check the mount type against the case before buying.
Each has a place. A variable filter replaces a stack of fixed densities and speeds up adjustments on location. Fixed filters stay simple and predictable. Band-optics offers both formats, so shooters can match the tool to their workflow.
Yes. Daylight pushes the shutter speed too high for smooth motion. An ND8 to ND64 filter brings light down so the shutter can sit near twice the frame rate, following the 180-degree shutter rule. Footage looks cinematic instead of choppy.