close
Choose Your Site
Global
Social Media

Views: 0 Author: Site Editor Publish Time: 2026-01-09 Origin: Site


Objective lenses are the main part of a microscope. They help people see small details in samples. Picking the right lens changes how much detail you can see. It also changes how clear the picture looks. Scientists must choose carefully for high-resolution observation. The table below shows how different lenses work in studies:
| Lens Type | Optical Performance | High-Resolution Observation | Operational Performance |
|---|---|---|---|
| Dry Objective | Good | Good | Very Good |
| Immersion Objective | Very Good | Very Good | Has Challenges |
| Silicone Gel Objective | Very Good | Very Good | Very Good |
Dr. Robert M. Kershner says lens design matters. Optics and edge features change how clear the image is. Good lens design can help research results. If people know about magnification and lens design, they make better choices. This helps them get clearer images for their work.
Objective lenses help you see small details in samples. Picking the right lens makes your view clearer and shows more detail.
Magnification and numerical aperture (NA) are not the same. High magnification does not always show more detail if NA is low.
Pick lenses based on what your sample is and how thick it is. Long working distance helps when samples are thick.
Look at lens details like magnification, NA, and correction type. These things change how clear and sharp your image looks.
Use immersion oil with high-magnification lenses to collect more light and make images sharper.
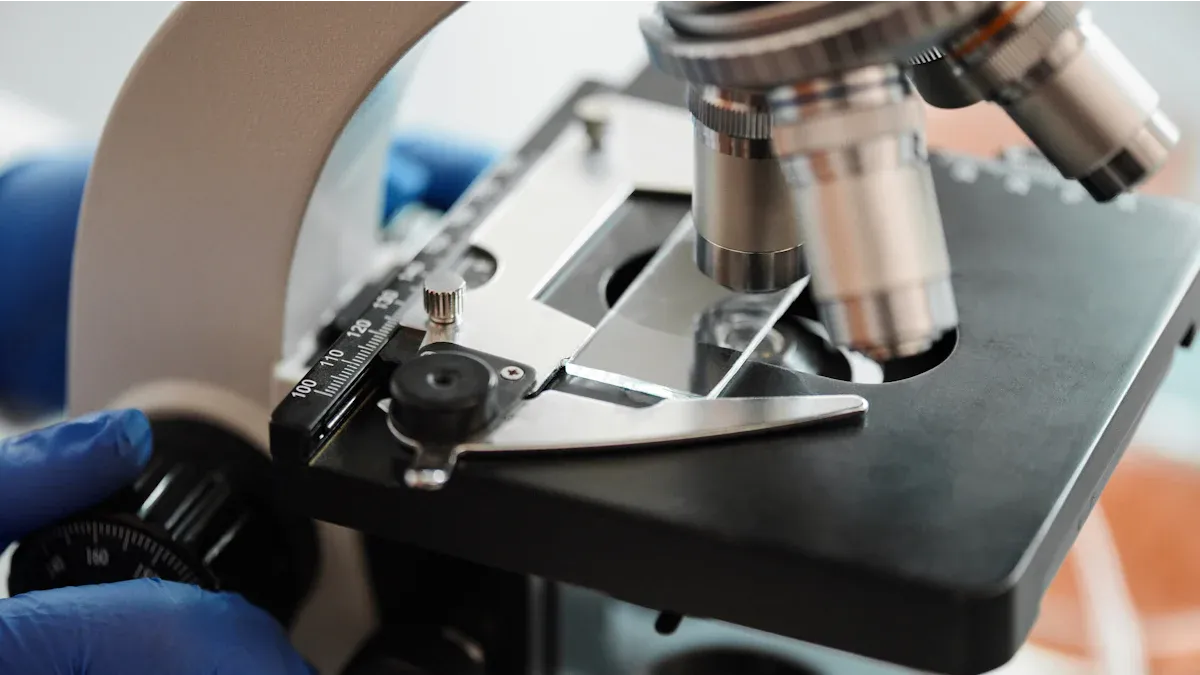
Image Source: pexels
Objective lenses are close to the specimen in a microscope. They help make the image bigger and collect light. Each lens has several glass pieces inside. These pieces fix mistakes in the image and make it clearer. The way objective lenses are made depends on the microscope type. Some have doublet lens groups. Others use hemispherical front elements. These designs control how light bends and stop the image from looking wrong.
The main jobs of objective lenses in compound microscopes are:
| Function | Description |
|---|---|
| Magnification | Objective lenses give different levels of magnification, like 4x, 10x, 40x, and 100x. |
| Light Gathering Ability | Numerical aperture (NA) shows how well the lens collects light. This changes how clear things look. |
| Resolution | Bigger NA values mean better resolution. You can see more details in the specimen. |
Makers use strong materials and special coatings to make lenses work better. These choices help the lens stay steady when temperatures change. They also cut down on reflections that are not wanted. Careful building makes sure each lens works the same and stops image mistakes.
Objective lenses decide how much detail you see in a sample. They change both how big things look and how clear the image is. The design and quality of these lenses affect how well the microscope shows tiny parts. For example, a 4x lens looks at large areas. A 100x oil immersion lens shows very small features.
4x (scanning objective)
10x (low power objective)
40x (high-dry objective)
100x (oil immersion objective)
Picking the right objective lens changes research results. Good lenses help scientists see cells, tissues, and microorganisms more clearly. Special coatings and careful building lower image mistakes and make things brighter. Choosing the best lens helps the microscope give clear and true images for science work.
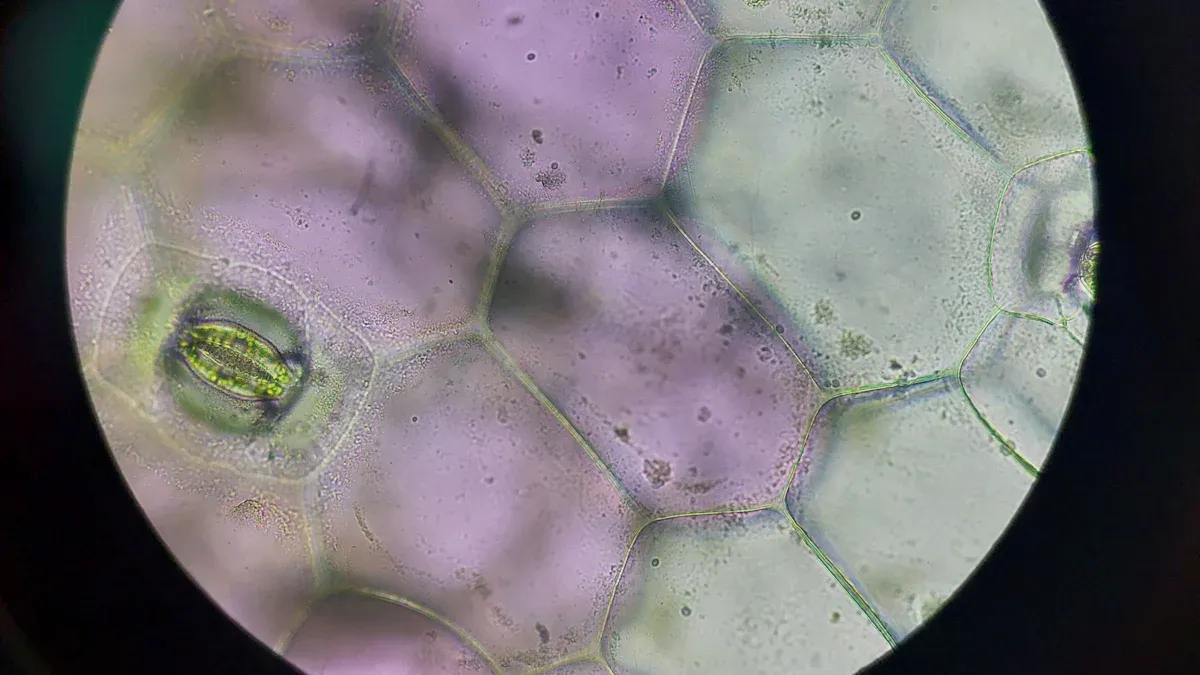
Image Source: pexels
Magnification makes tiny things look bigger in a microscope. This helps scientists see things they cannot see with just their eyes. When you turn up the magnification, the picture gets larger. But this does not always show more detail. In regular light microscopes, magnification only makes the image easier to see. It does not help you see smaller details. Resolution depends on numerical aperture and the color of light. Resolution tells how much detail you can really see.
Note: Magnification and resolution are different. Magnification makes things look bigger. Resolution shows how sharp and clear the image is.
When you use more magnification, you see a smaller area. You cannot see as much of the sample at once. High magnification also means only a thin part is in focus. For example:
More magnification makes the field of view smaller, so it is harder to see big samples.
At high magnification, only a thin layer is clear.
A good microscope picture needs more than just magnification. Numerical aperture is also very important for how well the microscope works. High magnification makes things look bigger. But it does not show more detail unless numerical aperture is high too. If you use high magnification without enough resolution, the picture looks bigger but not clearer. This is called empty magnification.
Numerical aperture helps you see more detail and makes the picture sharper. But it also makes the part in focus thinner. High numerical aperture lenses can show clearer pictures. But they may not keep much of the sample in focus at once. Sometimes, these lenses can also show more mistakes in the picture. Scientists need to balance magnification and numerical aperture to get the best results.
Numerical aperture tells how much light a lens can collect. It depends on the refractive index and the angle of light. Scientists use NA = n sin θ to find it. "n" is the refractive index. "θ" is half the angle of the light cone. If numerical aperture is higher, the lens gathers more light. This helps the lens show two close points as separate.
Numerical aperture shows the angle of light the lens collects.
Higher numbers mean better performance and more image detail.
Lenses with high numerical aperture make images brighter and clearer.
Numerical aperture changes how sharp and bright images look. When numerical aperture goes up, the lens sees smaller details. Scientists can see tiny things that would blend together. High numerical aperture lets in more light. This makes the image brighter.
| Parameter | Relationship |
|---|---|
| Image Brightness | Proportional to (NA/M)^2 |
| Numerical Aperture | Higher NA leads to brighter images and better resolution |
A lens with high numerical aperture lets more slanted rays enter. This helps you see fine details better. It also helps fix mistakes in the image, so it looks sharper. Sometimes, the objective lens works as the condenser too. In these microscopes, brightness depends more on numerical aperture than magnification.
Tip: Scientists should pick a lens with high numerical aperture for small details or bright images.
Knowing about numerical aperture helps people pick the right lens. This gives better pictures and more correct science results.
Picking the right objective lens is important. Many things affect how well a lens works. Each factor changes how clear the image looks. Scientists need to match the lens to the sample. They also need to match it to the imaging method. This helps them get the best results.
| Criteria | Description |
|---|---|
| Numerical Aperture (NA) | High NA helps collect more light and gives better images. |
| Working Distance | Long working distance lets you see deep inside thick samples. |
| Aberration Correction | Good correction keeps colors and shapes true in pictures. |
| Transmission Properties | High transmission helps the lens work well with special light. |
| Compatibility with Refractive Index | The lens must work with the sample’s refractive index for best results. |
Scientists use high numerical aperture lenses for fluorescence imaging. These lenses collect more light and show small details. Long working distance helps with thick samples like tissue or embryos. Aberration correction keeps colors and shapes correct. This is important for research and medical work.
Oil immersion objectives work well with permanent slides. Coverslip thickness does not matter much because oil matches the coverglass. If the sample is in water or saline, coverslip thickness matters more.
Different imaging methods change which lens is best. Phase contrast objectives help see whole cells in one layer. Fluorescence objectives work well with confocal microscopes. They give sharp images and control depth. The choice depends on the sample and how much detail you want.
Apochromatic objectives fix color and shape mistakes very well. They give good images with many colors. Achromatic objectives fix two colors and are good for simple viewing. Semi-apochromatic objectives fix colors better and are good for detailed work.
The immersion medium affects how well the lens works. Oil or glycerin matches the glass coverslip. This helps the lens collect more light. It makes images clearer and sharper. Immersion objectives use this idea to make pictures better at high magnification.
Choosing objective lenses needs careful thought. You must think about the sample, the imaging method, and lens details. Here are some tips to help you pick:
Think about the sample type and thickness. Thick samples need long working distance and lower magnification.
Decide how much detail you need. High-resolution needs high numerical aperture and good correction.
Make sure the lens fits the microscope. It should match the observation method, like brightfield or fluorescence.
Think about where you will use the microscope. Different places need different lens types.
Check the immersion medium. Oil, water, or glycerin can help collect light and make images clearer.
| Specification | Description |
|---|---|
| Working Distance | You must balance resolution and working distance. Pick long working distance for deep samples. |
| Image Flatness | 'PL' or 'Plan' objectives give flat images. |
| Chromatic Aberration Correction | 'ACH' to 'XAPO' show how well the lens fixes color mistakes. |
| Magnification | The number before 'X' shows how much bigger things look. |
| Immersion Medium | Shows if the lens needs oil or water, or if it is dry. |
| Observation Method | Codes show which methods work, like brightfield or phase contrast. |
Picking the right lens is very important. The lens’s numerical aperture decides how much light it collects. This affects both resolution and how thick the optical section is. Sample features like opacity and turbidity change how deep the laser can go.
For live cell imaging, scientists use lenses with long working distance and high numerical aperture. The FV3000 40X UPLSAPO40XS is good for long time-lapse imaging of live cells. The FV3000 30X UPLSAPO30XS has a very long working distance. It works well for thick samples like zebra fish embryos. The FV3000 60X PLAPON60XOSC2 fixes color mistakes best. It is good for co-localization analysis.
A fluorescence microscope uses filters and mirrors to control light. The lens must let light pass well at special wavelengths. This gives clear images. Phase contrast objectives use special parts to turn phase shifts into brightness changes. This helps scientists see clear samples.
Scientists should always check lens details before choosing. They need to look at magnification, numerical aperture, correction type, immersion medium, and if it fits the microscope. Picking the right lens helps get the best images for science and research.
Objective lenses have markings that tell users about their features. These markings show things like magnification and numerical aperture. They also show the correction type. For example, Leica lenses have these markings. The markings help people know how the lens will work. This helps scientists and students pick the right lens. Markings also say if the lens is for brightfield, phase contrast, or fluorescence imaging. Some markings show the immersion medium, like oil or water. This changes how clear the image looks.
Users should check if the lens is DIN compatible. DIN means Deutsch Industrie Norm. This standard lets users switch lenses between microscope models. If a lens breaks or gets lost, users can buy a new one. They do not need a new microscope.
Tip: Always read the lens markings before using it. This helps you avoid mistakes and get the best results.
Objective lens specifications tell users how the lens works. Each specification changes image quality and how easy it is to use. The table below explains common specifications on objective lenses:
| Specification | Description |
|---|---|
| Magnification Range | Shows how much bigger the lens makes the specimen look. |
| Numerical Aperture | Higher NA means better resolution and brighter images. |
| Working Distance | Tells how far the lens must be from the specimen to focus clearly. |
| Field of View | Shows the area you can see through the lens at a certain magnification. |
| Correction Type | Says if the lens is achromatic, plan, or apochromatic. This changes color and image flatness. |
Different correction types change how the lens fixes color and focus. Achromatic lenses fix two colors and give basic performance. Semi-apochromatic lenses fix color better. Apochromatic lenses fix three colors and make the field flattest. The table below compares these types:
| Lens Type | Field Flatness | Focus Difference (Red vs Blue) | Focus Difference (3 Colors) |
|---|---|---|---|
| Achromatic | Up to 25 mm | ≤ 2x depth of field | N/A |
| Semi-Apochromatic | Up to 25 mm | ≤ 2.5x depth of field | N/A |
| Apochromatic | Up to 25 mm | ≤ 1.0x depth of field | N/A |
Some advanced lenses, like the Mesolens, can image large specimens with high resolution. These lenses collect many optical sections. This helps scientists study deep organs in embryos. Lens specifications also include optical parameters, design limits, and optimization steps. These details help users match the lens to their microscope and research needs.
Objective lenses help microscopes show clear and detailed images. People should look at lens details before picking one. Check things like numerical aperture and working distance. Experts give these tips:
Change numerical aperture for your sample and job.
Use immersion oil with high-magnification objectives.
Line up the optical system and set the aperture diaphragm.
The best resolution comes from the light’s wavelength, the lens’s angular aperture, and the refractive index between the lens and the sample.
Choosing carefully helps you avoid mistakes. It also makes research better. You can ask questions or share your stories below.
Numerical aperture tells how much light a lens can take in. If the number is higher, you see more details. Scientists use this number to help them pick the best lens.
Some lenses need oil or water to match the glass cover. This lets the lens gather more light. It also makes the image look sharper when using high magnification.
People should think about what kind of sample they have. They need to check how thick it is and how much detail they want to see. They should also look at the lens’s numerical aperture, working distance, and correction type.
Markings tell you the lens’s magnification and numerical aperture. They also show the correction type and if you need oil or water. These markings help people choose the right lens for their work.
Many lenses work with different microscopes if they follow DIN rules. This means you can switch lenses without buying a new microscope.


